Getting Started
Use the Connector in Your Project
Option 1: Maven Central Repository

Edit File pom.xml
Copy and paste the following Maven Dependency into your Mule application pom file.
<dependency>
    <groupId>io.github.mulesoft-ai-chain-project</groupId>
    <artifactId>mule4-aichain-connector</artifactId>
    <version>1.2.0</version>
    <classifier>mule-plugin</classifier>
</dependency>
Option 2 - Local Maven Repository
System Requirements
Before you start, ensure you have the following prerequisites:
- Java Development Kit (JDK) 8, 11, and 17
- Apache Maven
- MuleSoft Anypoint Studio
Download the MuleSoft AI Chain Connector
Clone the MuleSoft AI Chain Connector repository from GitHub:
git clone https://github.com/MuleSoft-AI-Chain-Project/mulesoft-ai-chain-connector.git
cd mulesoft-ai-chain-connector
Build the Connector with Java 8
mvn clean install -DskipTests -Dgpg.skipBuild the Connector with Java 11, 17, 21, 22, etc.
Step 1
export MAVEN_OPTS="--add-opens=java.base/java.util=ALL-UNNAMED --add-opens=java.base/java.net=ALL-UNNAMED --add-opens=java.base/java.util.regex=ALL-UNNAMED --add-opens=java.base/java.lang.reflect=ALL-UNNAMED --add-opens=java.base/java.lang=ALL-UNNAMED --add-opens=java.xml/javax.xml.namespace=ALL-UNNAMED"Step 2
For Java 11
mvn clean install -Dmaven.test.skip=true -DskipTests -Dgpg.skip -Djdeps.multiRelease=11

For Java 17
mvn clean install -Dmaven.test.skip=true -DskipTests -Dgpg.skip -Djdeps.multiRelease=17

For Java 21
mvn clean install -Dmaven.test.skip=true -DskipTests -Dgpg.skip -Djdeps.multiRelease=21

For Java 22
mvn clean install -Dmaven.test.skip=true -DskipTests -Dgpg.skip -Djdeps.multiRelease=22
Add the Connector to your Project
Add the following dependency to your pom.xml file:
<dependency>
    <groupId>com.mulesoft.connectors</groupId>
    <artifactId>mule4-aichain-connector</artifactId>
    <version>{version}</version>
    <classifier>mule-plugin</classifier>
</dependency>The MAC Project connectors are constantly updated, and the version is regularly changed.
Make sure to replace {version} with the latest release from our GitHub repository (opens in a new tab).
Connector Configuration
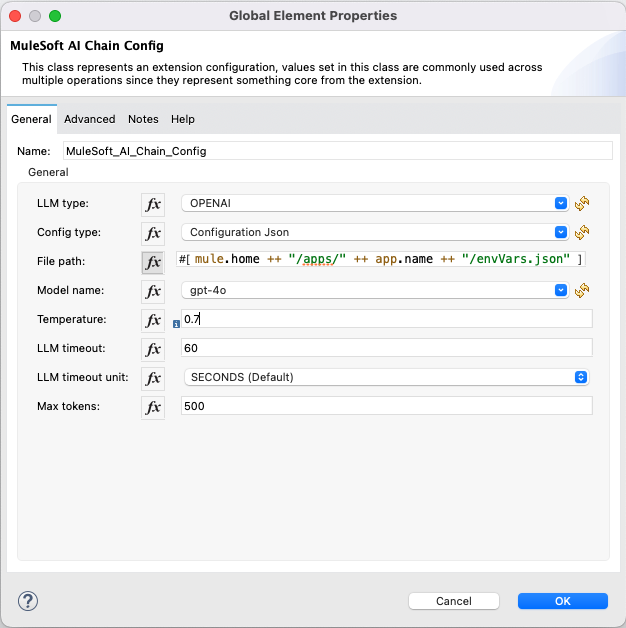
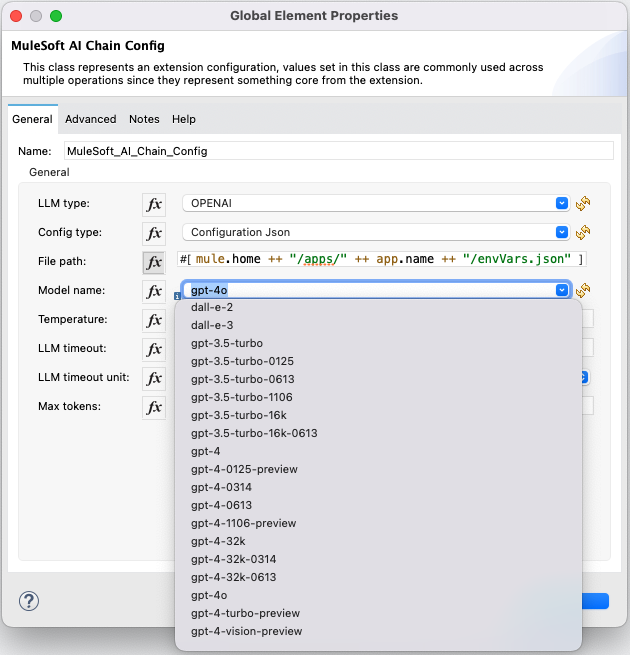
The MuleSoft AI Chain connector can be easily configured. Go to the Global Elements in your MuleSoft project, and create a new configuration. In the Connector Configuration, you will find the MuleSoft AI Chain Llm configuration. Select it and press OK.

LLM Configuration
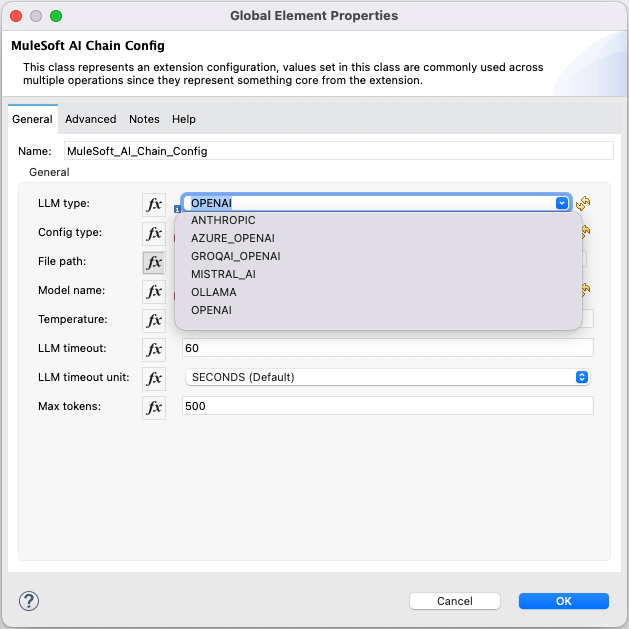
MuleSoft AI Chain supports multiple LLM configurations:
- Anthropic
- Azure OpenAI
- Mistral AI
- Hugging Face
- Ollama
- OpenAI
- GroqAI
- Google Gemini
Select the LLM type of your choice from the LLM Type dropdown field.
Configuration Type
The LLM configuration in MuleSoft AI Chain supports 2 different configuration types.
- A) Environment Variables: This configuration requires you to set the environment variables in the operating system where the Mule runtime will be deployed. When you choose this option, enter a '-' in the File Path fields.
- B) Configuration Json: This configuration requires you to provide a configuration JSON file with all the required LLM properties.

A) Environment Variables
After choosing the Environment Variables option, you need to provide the dedicated environment variables for the selected LLM.
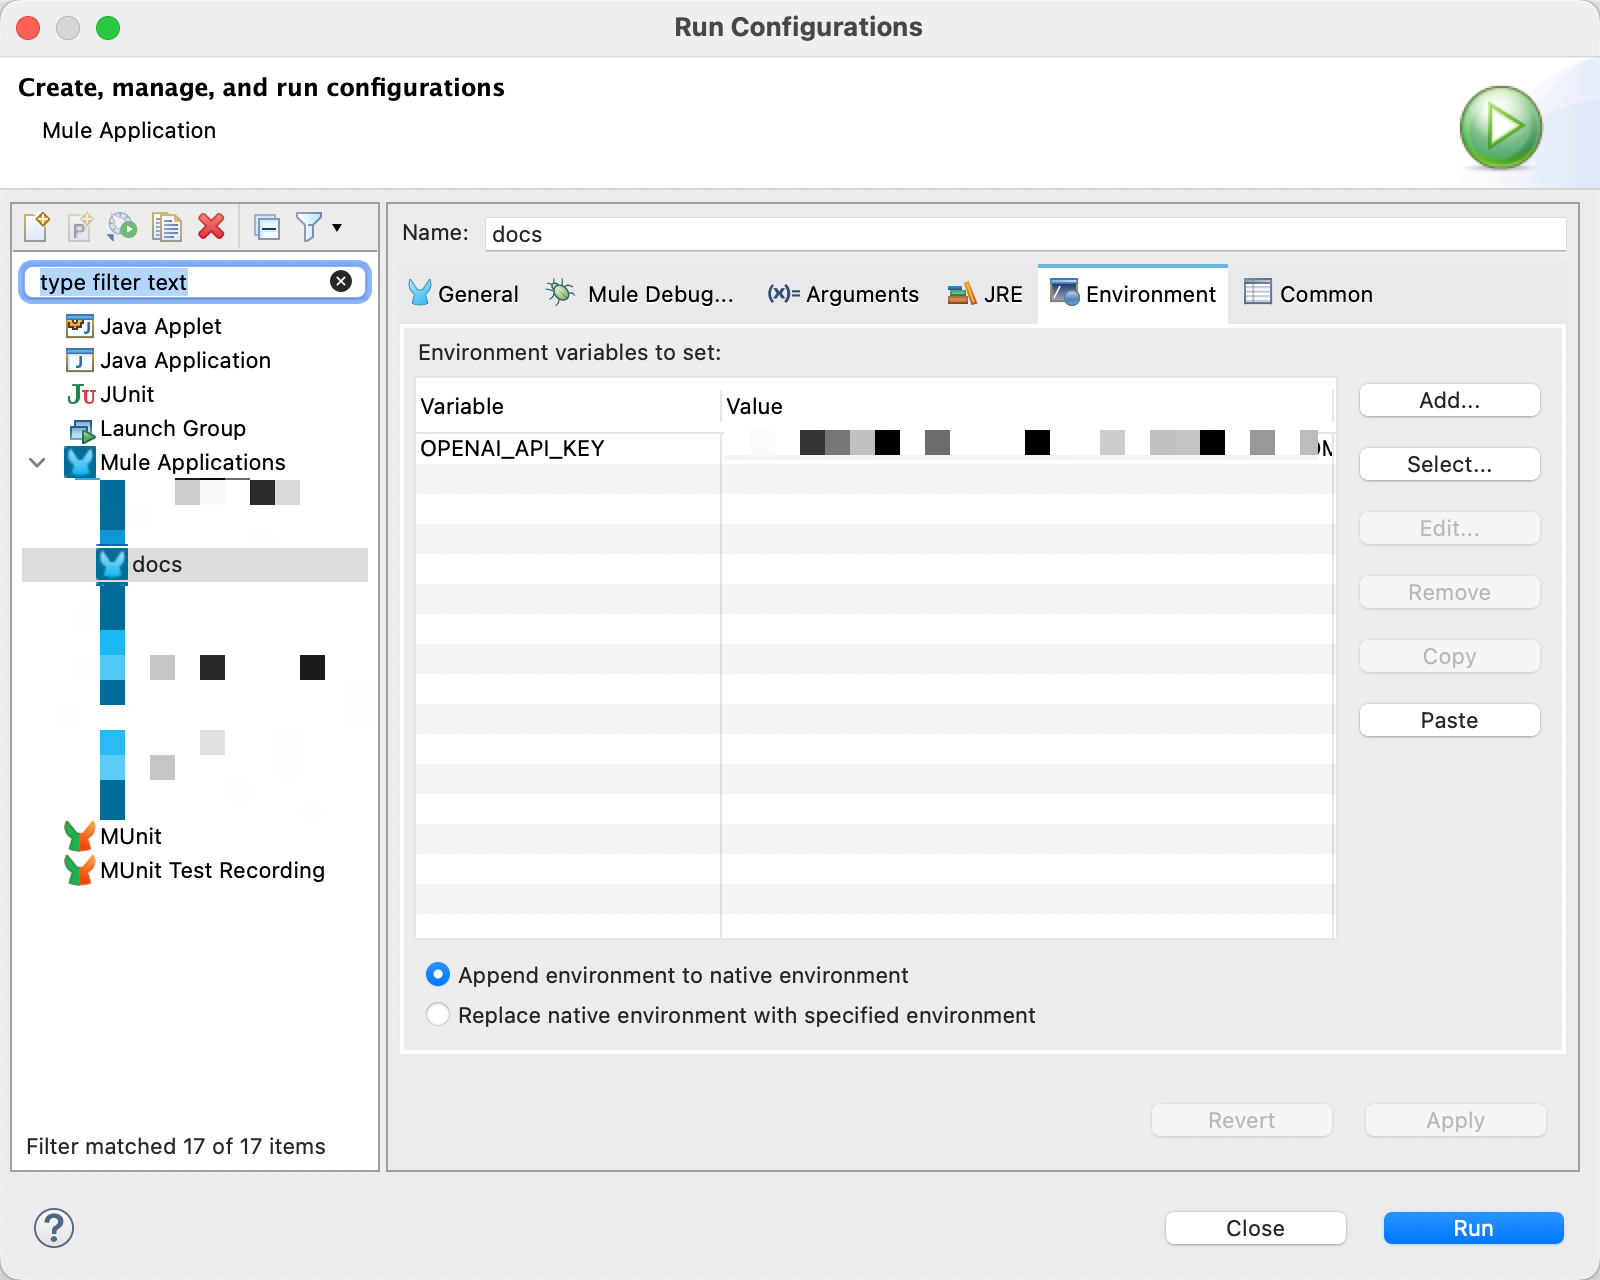
In design time (in Anypoint Studio), you can update the run configuration to include the environment variables.
Environment Variables by LLM Type
Based on the LLM Type, you need to set different environment variables. Here is a list of all environment variables based on the currently supported LLM Types:
# Anthropic:
- ANTHROPIC_API_KEY

# Amazon Bedrock:
- AWS_ACCESS_KEY_ID
- AWS_SECRET_ACCESS_KEY

# Azure OpenAI:
- AZURE_OPENAI_ENDPOINT
- AZURE_OPENAI_KEY
- AZURE_OPENAI_DEPLOYMENT_NAME

# MistralAI:
- MISTRAL_AI_API_KEY

# OpenAI:
- OPENAI_API_KEY
  (OpenAI Custom BaseURL is not supported yet)

# Ollama:
- OLLAMA_BASE_URL

# Groq AI:
- GROQ_API_KEY
B) Configuration JSON
When choosing the Configuration Json option, you need to provide the dedicated configuration JSON file path with all the required properties.
You can use the DataWeave expression if you want to store this configuration JSON in the resources folder of your Mule application.
DW Expression: mule.home ++ "/apps/" ++ app.name ++ "/envVars.json"
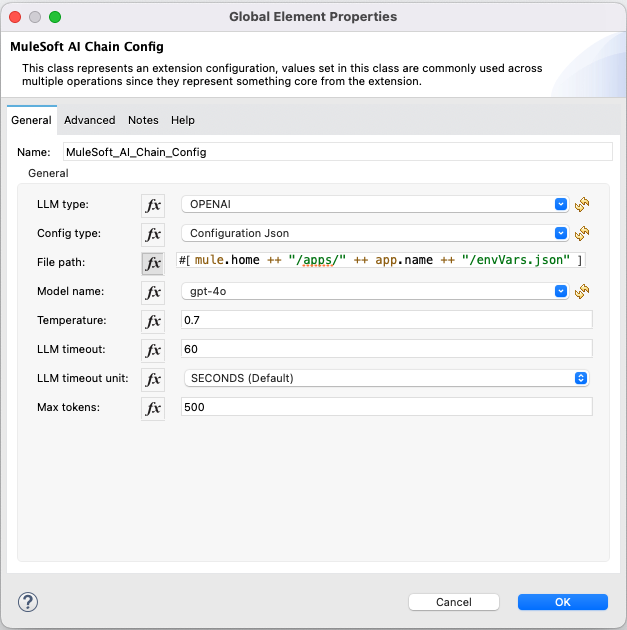
Configuration Json File Example
This is an example of the configuration JSON file. Make sure to fill out the required properties for your LLM type. The file can be stored externally or added directly in the Mule application under the src/main/resource folder.
{
    "OPENAI": {
        "OPENAI_API_KEY": "YOUR_OPENAI_API_KEY"
    },
    "MISTRAL_AI": {
        "MISTRAL_AI_API_KEY": "YOUR_MISTRAL_AI_API_KEY"
    },
    "OLLAMA": {
        "OLLAMA_BASE_URL": "http://baseurl.ollama.com"
    },
    "GROQAI_OPENAI" :{
    	"GROQ_API_KEY" : "YOUR_GROQAI_APIKEY"
    },
    "ANTHROPIC": {
        "ANTHROPIC_API_KEY": "YOUR_ANTHROPIC_API_KEY"
    },
    "AZURE_OPENAI": {
        "AZURE_OPENAI_KEY": "YOUR_AZURE_OPENAI_KEY",
        "AZURE_OPENAI_ENDPOINT": "http://endpoint.azure.com",
        "AZURE_OPENAI_DEPLOYMENT_NAME": "YOUR_DEPLOYMENT_NAME"
    },
    "HUGGING_FACE": {
        "HUGGING_FACE_API_KEY": "YOUR_HF_KEY"
    },
    "GEMINI_AI": {
    	"GEMINI_AI_KEY": "YOUR_GEMINI_KEY"
    }

}
Model Name
After choosing the LLM provider, the available and supported models are listed in the model name dropdown.
Temperature, Timeout (Duration in sec) and Max Token
Temperature is a number between 0 and 2, with a default value of 0.7. The temperature is used to control the randomness of the output. When you set it higher, you'll get more random outputs. When you set it lower, towards 0, the values are more deterministic. Timeout is provided in seconds and determines when the request should be timed out. The default is 60. Max Token defines the number of LLM Token to be used when generating a response. This parameter helps control the usage and costs when engaging with LLMs.